CLICK HERE FOR FREE BLOGGER TEMPLATES, LINK BUTTONS AND MORE! »

Monday, December 19, 2011

Christmas Punch

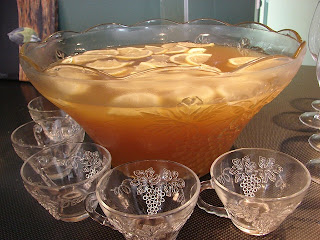
Here is the recipe for a delicious and festive Christmas punch!
I usually take this to Christmas parties that I go to, and I
always have lots of people asking for the recipe.... it's so
easy, that you really just HAVE to try it!

Two 2 liters of Ginger Ale
1 can of Frozen Lemonade
Green and Red Maraschino Cherries, drained
**Optional-the picture above shows sliced fruit as a garnish**

Pour all ingredients in a large punch bowl.
Freeze over night. Thaw for a couple hours before
serving.  I usually serve the punch while it's still slushy
and icey... but it's still good when it's completely thawed.

Hope you have a blessed holiday... and don't forget
why we REALLY celebrate CHRISTmas!! God bless!

Friday, December 16, 2011

**Christmas Cards 2011... and 2010**

I love getting photo Christmas cards from people,
so I decided when I got married that I would send
photo Christmas cards too =) I wanted to share this
year's Christmas card with y'all... and throw in last year's
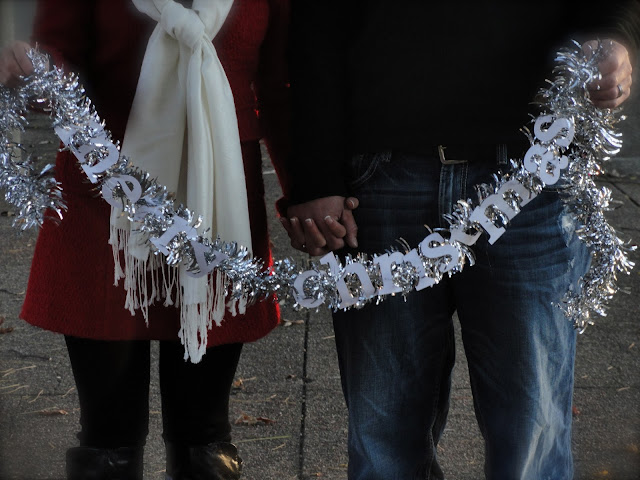
card too.  Here's the front and back of the cards:
I bought silver tinsel garland and used a cricut to cut
out the letters, and then just hot glued them to the garland.
My sister, Rebekah, took the pictures one day when
Isaiah and I went to visit her (and her hubbie) in Louisville, KY.
We went to a local park and Rebekah just started clicking away.
It was pretty cold, so we didn't stay outside for long!
And Isaiah was such a good sport about it!!
The same evening, we uploaded the pictures to Vistaprint.
I choose an oversized postcard.  Since the garland said
"Merry Christmas," I didn't feel like it was necessary to have
the design of the card say something as well.

Here's some other pictures from that day:


AND... here's the silly pictures when we needed
to have a little fun!!


This yawn meant I was TIRED and DONE!
But it really was fun and took less than an hour.
Thanks sis for taking, uploading, and editing
the pictures for my Christmas card!!
And here's our Christmas card from 2010... since we got
married earlier that year, I decided to use a wedding picture.
This was a Vistaprint creation too....


Hope you have a wonderful Christmas!
God bless!

Thursday, December 15, 2011

DIY Mesh Ribbon Wreath

While shopping at AC Moore one night, I saw
these mesh ribbon wreaths that I thought were really pretty -
but they were $60 and $70 each! After inspecting them
a little closer, I decided I could do it myself.  So here it is!!

 So... I bought a green garland wreath for $4 and this gold mesh 
stuff, that I'll call "ribbon" that was originally $10, but of course,
I used a coupon. There is a ton of ribbon on the spool, so it can be
used for multiple wreaths.  I also went to the Dollar store and
bought 10 clusters of round ornaments. With these items, plus my hot
 glue gun, I was set. **Just so you see the size of the mesh ribbon,
here's a stock image of it, in red**

This was SO easy - I couldn't believe anyone would charge (or pay!)
$60 for a wreath like this... All you do is gather about 10-12 inches
of ribbon, push it together, and use a piece of the garland on the wreath
to hold it down.  I have made two of these wreaths and did 6 sections on
one wreath, and 5 sections on another.  I like 6 sections better than 5.

Once the mesh ribbon sections were secure, I placed the cluster
ornaments between the mesh ribbon section, and on the inside and the
outside of the wreath. I also used a few leftover ornaments that
I had laying around to fill in some gaps where I didn't need to use
a whole cluster, but wanted a little something.  I hot glued all of these
in place.  You'll want a high temp glue gun for this.

The picture above is of the 5 section wreath. I left the inside of
this wreath plain, but you can always hang something from the middle.
On the other wreath I made with 6 sections of ribbon, I added a
snowflake ornament - I just hung it on a piece of the green garland. 

The color combinations and the variety of things you can add to
this kind of wreath are endless =) Hope you enjoyed this post... 
Next, I hope to share my Christmas cards with you!


DIY Ornament Wreath

I recently made my first ornament wreath and I absolutely love it!
It's super simple to do, but just takes a little bit of time.

I started out with a green garland wreath from AC Moore,
it was on sale for about $4.  The one I got was a 24" wreath. I spray
painted the top and sides silver, just in case there would be any gaps
between the ornaments (and there was, so I suggest not skipping this step!).  I
bought a variety of round ornaments from the Dollar Store - it takes more
ornaments than you think - I used over 100! I made a mess in my house for
a couple days, but it was definitely worth it.


Remove the hardware from the top of the ornaments. Using a high temp glue gun, 
hot glue medium size ornaments along the inside of the wreath. Then, hot glue
 large ornaments around the outside of the wreath. Fill in the rest of the wreath
with all the different sizes. You probably won't be able to glue all the ornaments
to the wreath itself, and will need to glue many of the ornaments to each other. 
AND... Voila! You have a beautiful custom wreath.

Hang it on your front door, or on a mirror, like I did.
You'll be glad you made this wreath - it's so festive and stunning!


I've made another kind of Christmas wreath and hope to
post it soon.  Have a wonderful day and God bless!


Tuesday, November 29, 2011

Bandana Theme Reception

A couple weeks ago, my church honored a very sweet couple,
Charles & Patsy Escue. They have served at our church for
over 30 years, and we wanted to recognize them. I was asked to do the
decorations for it and was happy to help in any way possible =)
And of course, I enlisted the help of my mom and sister!!!
Since we had quite a few events at church recently with a "fall theme,"
I decided I wanted to do something different. Charlie is a good ol' country
boy, so I decided to use bandana's as the main decor with a red/white/black
color scheme. Here's a few pictures of the overall view of the room:


We had some scrap fabric and construction paper that we used for the
pennant. We threaded a needle with fishing line and wove it in and out at the top
of each fabric square, and attached the fishing line to the top of the black scrims with
thumb tacks. Straw wreaths were wrapped with bandana fabric donated by a
friend from church (thanks, Debi!) and the large, single felt flower was the
perfect touch (here's a tutorial on how to make the felt flower).
The white fabric that we used as curtains was already at the church, and 
we cinched them by using leftover fabric from the wreaths. Such simple and
easy ideas that all came together beautifully and cost next to nothing!  


The food was potluck (finger foods and desserts), brought by those
who attended the reception.  I had my mom wrap forks inside the napkins
and tie with a variety of ribbons, and we displayed them in a black basket
lined with a bandana.  The drink dispensers were decorated with a
bandana ribbon and a couple bandanas in the bottom of each dispenser.
The red runner on the food table was also fabric that the church already had =)


The lattice was decorated using bandanas that we borrowed
from many different church members. *As people dropped off bandanas
for us to borrow, we put their name on a small piece of masking tape
and immediately put it on the bandana. That way, we knew everyone would
get back exactly what they brought.* We tied the bandanas together
and attached them to the lattice using fishing line and little bit of white
duct tape.  The black fabric was draped to hide where the lattice
was hinged together. Since the church already had the lattice and black
fabric, this decoration did not cost a SINGLE penny!!!

The tables were decorated using a mixture of black and white tablecloths
(that the church already owns), mason jars, tissue paper flowers,
and a personalized frame. Thanks for letting us borrow the jars,
Mom and Debi! My sister made the tissue paper flowers (tutorial).
We attached them to a pipe cleaner (instead of floral wire), and weighted
them down by hot gluing two glass rocks to the end of the pipe cleaner.
Each mason jar was also tied with a cute, coordinating ribbon. The frames
were originally silver and used at my sisters' wedding for table numbers,
then we spray painted some of them black and used them to display prices at
a craft fair. So, for this reception, we just changed out the ribbon, and had my
mom type up 5 different things about Charlie and Patsy (information was
provided by the wife of the Escue's oldest grandson - thanks Jaime!) It was so
sweet and the perfect touch for the centerpieces! Too bad my iPhone pictures
weren't good enough to distinguish the words on the frames. A red bandana on
each table gave a pop of color, and black chair covers (from my wedding)
always dress up a room and instantly make it look so much nicer!
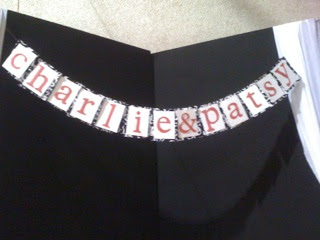


The dessert table also had centerpiece decor on it (minus the frame),
and we included another basket of forks. For the coffee cart, we used
leftover fabric from the wreath as a runner.


One of the family members (Jaime, who came up with the sayings for
the frames) also made a board of pictures of Charlie and Patsy
over the years. It was so sweet! It was even decorated with the
bandana theme =)  The personalized candle was from my sister and me.


And of course, we had to decorate the trashcans...
we couldn't have blue plastic trashcans out - that would
NOT have gone well with the theme!!!


So that's it for the reception decoration, BUT... I have to show you pictures of 
Charlie and Patsy because they are just adorable... here they are being
recognized during the Sunday morning service.  Aren't they so precious?!?

Charlie loves Southern Gospel music, so he, one of his
daughters, and his two granddaughters sang on Sunday morning.
In honor of Charlie, I decided to wear my cowboy boots (you can sort of
see them in this picture-teal dress in the choir loft), and Charlie loved them!! 

On Sunday evening prior to the reception, we had a Southern Gospel
music night. Charlie got up and sang a couple songs with some of the
band members from church. It was so much fun, and something different!

I was so glad to be able to help decorate for this reception... and
I was pretty plumb proud of myself for borrowing, repurposing,
and reusing things instead of buying new stuff =) 
Thanks Charlie and Patsy for your dedicated service to our church,
and to Christ.  Our appreciation is nothing compared to your riches
in Heaven! Have a wonderful day... and God bless!