CLICK HERE FOR FREE BLOGGER TEMPLATES, LINK BUTTONS AND MORE! »

Thursday, February 9, 2012

Fall Theme Welcome Reception

Last fall our church hired a new Worship Pastor, so to welcome him
and his wife, we had a meet and greet type reception. The church
asked if I would take care of the decorations, so of course, I said yes!!!


I didn't have a whole lot of time to plan or to make lots of things specifically
for this reception, so I decided to work with what was already available.
Luckily, last spring, there was a beautiful baby shower at the church, and
a lot of the decorations were still being stored in the attic (check out my friend
Jerica's blog about the baby shower for her sister here... it was amazing! She and her
sister both throw such great showers!!) So I asked if we could borrow some of those
items, and just repurposed them to work for the reception.
At the baby shower, these yarn balls (which were also used at Jerica's wedding!)
had paper flowers attached to them and were strung up behind the food table.
I removed the paper flowers, and attached red, orange, and green leaves to them.
Then hung them up around the welcome sign. They may have been my favorite
part about the whole shower! Maybe sometime I will blog about how to make
them - they are super cheap, super cute, just a little time consuming, and MESSY.
Here they are at the baby shower:

And here is how I changed them up for the reception:
Also at the baby shower, a tree was cut in pieces to make "chargers" for
each place setting. One side of the wood was painted, but the other side
was blank. So I used the blank side as part of the centerpiece.
At the baby shower:

At the reception:
For the rest of the centerpiece, I went out and gathered sticks and limbs.
Then my sister and I grabbed a hand saw and just started arranging the sticks
into vases filled halfway with stones.  Then we hot glued fake leaves to the sticks,
and added a burlap bow. This arrangement sat on the piece of wood.
I also made more fabric vases using a variety of red, tan, yellow, orange, and
green fabric and added one fabric vase per table. I raided the church's prop room
and found a ton of old burlap fabric. We cut this fabric and sewed the edges to
make table runners. It ended up taking a lot longer than we anticipated to make
 the edges perfect, and we made a HUGE mess, but I think it ended up
looking AmAzInG, so it was worth it =)


Another decor item that was borrowed from the shower were what I call
log holders. It was small pieces of a tree with a hook drilled in it. At the baby
shower, maternity pictures were put in these holders.  Since they were so stinking cute, I
wanted to use them so badly at the welcome reception, so I used them as food signs.
How they were used at the baby shower:

How we used them at the reception:


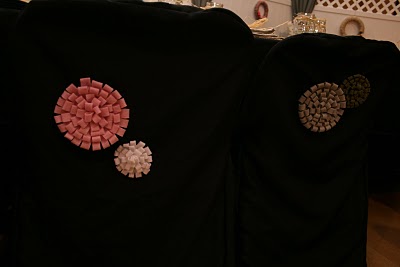
P.S. The cans wrapped in twine with pencils also wrapped in twine
were from the baby shower too!! We used them for people to wear
name tags to help the new worship pastor and his wife get to know people.
I made lots of welcome wreaths to hang around the room. I used straw wreaths
wrapped with strips of burlap. Then, using the same fabric from the vases, I made
rosettes and hot glued them to the wreath. My sister cut out triangles from scrapbook
paper and wrote the letters out using a Sharpie to spell WELCOME. These letters
were glued to black yarn and then hot glued to the wreath. Add a small bow on each
side of the sign, and it's done! These wreaths were hung on white lattice, and were
separated with black fabric that was tied with a burlap bow.


The welcome sign was made using scrapbook paper and a cricut. My sister
had the letters cut out, glued them to the paper, hole punched the top
and strung black yarn through it. Simple, inexpensive, easy, adorable =)

I found the perfect paper plates and napkins at the dollar store. And
our church already had this orange basket that we put the utensils in.
I just added a little burlap on the inside, and we were set.


This reception was such a great time, and it helped to welcome
two wonderful people (shown below!) who have already made such an
 impact on our church in just a short period of time. And it helped prove
to me that I don't always have to find new ideas - I can just as easily use
old ideas in new ways. Hope you enjoyed this post, and God bless!


Thursday, January 26, 2012

A Vintage Country Chic Shower

Last spring, Rebekah and I threw a bridal shower that we refer
to as Vintage Country Chic.... I don't know how else to explain it =)
Here's some pictures of the room:


We started out with buying burlap. We cut the burlap into placemat
sized pieces, then frayed the edges.  Rebekah sewed each side so they
wouldn't fray more than what we wanted.  Then, Rebekah hand painted
a variety of words on each placemat. 


To make the fabric vases, we saved all sorts of soup cans in as many
sizes as possible. Then I went to the remnant and discount fabric section at
JoAnn Fabrics and bought different fabrics in black, tan, and denim designs.
I cut strips of fabric and hot glued them around the cans.  Then I made
fabric rosettes (tutorial found here) and attached a few around the cans.
It was such a simple and inexpensive project!


With the leftover fabric from the vases, we decided to make napkins. So
Rebekah just sewed the edges of the cut pieces so that once again, they
wouldn't fray. We placed fancy-looking plasticware on the napkins, and tied
raffia around it.  Mason jars were used as drinking glasses, with raffia tied
around each one of those too (thanks to Jerica Hibner for lending the jars to us!).


I made 6 yarns wreaths of different sizes and different colors. These wreaths were
also part of the door prizes given out! They were hung on white lattice that our
church already owns.  After we hung the wreaths, I decided that the lattice
needed something more.  So I looked in the church's attic where we store fabric
and found some gray material.  I draped it over the lattice at each place there
was a hinge and cinched it in the middle with a strip of burlap.  It ended up
looking really good, if I do say so myself!! We also did it to black screens that
were used to cover up the opening to the kitchen.


We wanted to do something more than just plain black chair covers, so Rebekah
made lots of felt flowers (tutorial here) in pink, gray, white, and green.  These were
attached to the back of the chairs using safety pins-it was a LONG process! But
thanks to Jerica Hibner and Danya McClintic, the process went a little faster - they
were so sweet to offer to help the night we were setting up!!!


Rebekah and I bought a gift for the bride-to-be and also for her 4 year old
daughter, Isabella.  We put the gifts inside canvas totes that Rebekah
painted onto and added fabric rosettes. I thought they turned out pretty cute!

The favors that were given out were different pieces of jewelry (earrings,
necklaces, pins, bracelets) that Rebekah got for a GREAT price at a
store in Louisville, KY. Then, Rebekah MADE the gift boxes out of
cardstock paper and odds and ends (tutorial on how to fold boxes here).
Each box had a piece of batting in it so it really resembled a jewelry box!


On the day of the shower, one of the guests loved the decor so much that
she asked if we would throw the exact same shower for a friend of hers!
So a couple months later, we got to do this same shower over again! 

Here's some more pictures from the shower:
Yummy Desserts: Peach Cobbler, Pecan Pie,
and Razzleberry Pie with Vanilla Ice Cream!

Bags for the Door Prizes:

Signs for the Food:

Food Table, while we were setting up, so please
ignore the ironing board in the background!

Gifts for each of the kids that came to the shower:

Thank you notes we made for the bride-to-be.
The invitations for the shower resembled these
thank you notes, but they also had some lace on them:

Our inspiration for many of the ideas (namely the placemats and fabric 
vases) were found on the blog Black-White-Side-By-Side.
Hope you enjoyed this post... have a great day and GOD BLESS!

Tuesday, January 24, 2012

My Wintery Crystal Wedding!!

Yesterday was my TWO YEAR anniversary!! AND...
I decided to relive my wedding day by posting about it =)
The whole idea for my wedding was inspired by this
Wish Tree, to use instead of a guestbook:

I thought it was gorgeous and had never been to wedding where
anything like this had been done before. I knew that I wanted a January
wedding, and the idea of a wintery/crystal theme wedding seemed perfect!
With every decision I made, I asked myself the question - "In ten years,
will I look back and think this is tacky?" I really wanted to have a wedding
that was classic and timeless. Two years later I still love everything about it,
so hopefully I'll still feel that way on my ten year anniversary!

My colors for the wedding were black, ivory, and champagne. I knew I
wanted to wear an ivory dress because it would go better with my skin
tone than the traditional white. And I just love the color champagne.
Black is a classic color, so I knew I couldn't go wrong there.

I don't have a picture of my actual invitation, but I will show you the
inspiration for my invitation. If they didn't cost $28 PER invitation, I
would have gotten them! But... I was able to do something very similar for much less!

I ordered similar envelopes that also had the side pocket, except in black, 
 from a local company. We also had this same company print the invitations as
well as the cards for RSVP, Wedding Information, & Dinner Reception. The
 invitation and cards were ivory with dark champagne lettering.  I threaded champagne
colored satin ribbon into the embellishments (the ones I got are shown below) and
wrapped the ribbon around the outside of the black envelope.


 I knew that I wanted black chair covers, champagne chair sashes and champagne
table runners. So when pricing everything, we figured out it would be cheaper to buy
them than to rent! Isn't that crazy?!? But I'm sure glad that was the case, because
we have been able to use the chair covers time and time again, and a few people
have been able to reuse the chair sashes and table runners! I used almost all
rectangle tables to make long lines of tables in the room, and used a couple
round tables towards the front that were reserved for family members.


I had the hardest time deciding what to do for centerpieces. Eventually,we ended up
with a tall, skinny glass vase with 3-4 gold branch clusters with crystals attached
at the ends. I knew this was exactly what I had been wanting. After deciding that this
was what I liked,  my sister said she would go get the rest of the materials. What she didn't
tell me was that these crystal branches were seasonal items being sold for Christmas, and
the store would not order more and only had about 8 in stock!! Rebekah called
everyone she could think of to have them check their local Michael's craft store
and buy as many of these that were left! Even friends of ours that were taking a trip
stopped at Michael's stores along the way to get them! But I didn't know any
of this until we got all the branches that were needed. It was definitely smart to
keep me out of the loop on that one!
I also wanted to do something similar to the centerpieces, but on a much bigger scale.
I had Isaiah cut down tons of branches, and then spray painted them gold.
We got a lot of white lights and Rebekah taped over each light, then spray painted
the wires gold as well... and then, of course, the tape had to be removed. Using 5 gallon
buckets, the branches were set in concrete into the buckets. Then lights draped on
the branches, and crystal ornaments hung on the branches. The buckets were draped with
black fabric with a gold sash around the buckets.  These were placed all around the room.
I loved them!!! The venue asked if they could keep them after the wedding, and since
they were so heavy, it made it easier on us to leave them!

Because I was having a winter wedding, I really REALLY really wanted an ice sculpture!
Isaiah pretty much researched all this for me and after we picked the one we liked,
he did all the ordering and arranging for it to be picked up and stored. This ice sculpture
was set on a table with some of my bridal portraits framed around it, and the table
was the focal point where the food was served. I thought it was beautiful =)

Our wedding cake was beautiful... I actually bought clip on earrings and
attached them to gold satin ribbon and had the cake lady attach them to the
cake.  I LOVE that the lengths of the ribbon were all different =)


The groom's cake was so fun - my husband is an avid hunter, so it was
perfect for him! I found ceramic deer heads and attached a dow rod to the
inside of the heads using insulation foam. My father-in-law cut down a tree
stump and evened it out so that we had a "custom" cake stand! Isaiah
absolutely loved it.... it was probably HIS favorite part of the wedding!

I wanted a huge bouquet, but was trying to cut costs where I could.
My sister and I ended up making all the bouquets for the wedding!
We used ivory silk roses, wrapped the stems with satin champagne ribbon,
and attached a crystal ornament to each bouquet.  I thought they were perfect,
and you really couldn't even tell that they were fake!!

I originally thought that I wouldn't have programs at the wedding.  I just
didn't really think it was necessary.  But not too long before the big day,
I changed my mind! I designed them and my mom printed them on cardstock.
I had seen one other person make a wax emblem on their invitations, and I
thought it was very classy and something different. So I decided to do it on
my programs. It was a TON of work, but they turned out so perfect =)

I wanted kids to come to the wedding, but I thought I should have something
to keep them occupied during the ceremony.  I bought a bunch of silver
tins from the Dollar Store and filled them up with fun things for the kids to
play with - nothing that made noise though! We distinguished the boxes
for boys and boxes for girls by putting a gold bow on the girls boxes, and
black bows on the boys boxes.

Here's some more pictures from the wedding day....
The Backdrop:

My Adorable Parents:


 an AMAZING band - Santa Cruz - they were fantastic!!!

 Both my dad and mom's sides of the family - the Greene's and the Gunter's:

The Groomsmen:


Our nephews - they were tired!!!

 Father/Daughter Dance:

My FAVORITE bridal portrait:

Our Rings:

Bouquet, Shoes, and Garter:

My Wish Tree:

After Isaiah and I had been married for a year, I decided to bust
out my dress and get pictures taken again! It may sound silly, but it
was actually so much fun! My brother-in-law's brother was getting
into the photography business and had not photographed a bride and
groom yet, so this was great "practice" for him and a good excuse for me
to get all dressed up again!! Maybe I'll do it again for our 5 year anniversary =)
Here's some pictures from that session:


I love looking back on that day and remembering how wonderful
it was =) Hope you have a wonderful day, and God bless!!