I wanted to share the Halloween wreath I made this year - it was such
an easy craft - if you still need a wreath, it's not too late! You can
make this and have it up in time for Trick-or-Treat =)
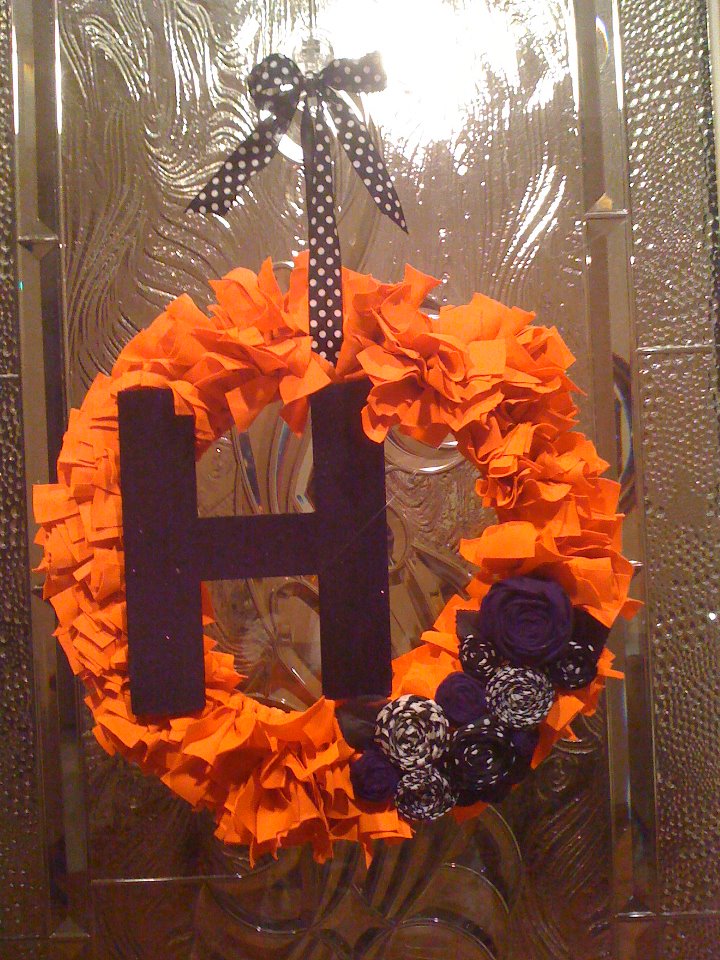
I already had an orange fabric remnant that my sister saved from
being thrown away. And I had various black and white ribbons -
zebra print, houndstooth, and polka dot. I also had an "H" initial
that was used in a sign for a party that I threw a couple months ago.
I thought it would be perfect since it can stand for both "Haynie" (my
last name) AND "Halloween!" I decided that since I already had a
good start for the makings of a wreath, I may as well get the
other couple of items that were needed to do it.
I bought a small 4 layer wire wreath from Hobby Lobby - with a 40% off coupon!
It's already inexpensive, but I like to save money every chance I get =)
It's already inexpensive, but I like to save money every chance I get =)
I cut a ton of strips of the orange fabric, about an inch wide and about
6 inches long. The strips don't have to be exactly the same, so just eyeball it
when you are cutting. Or if the fabric allows, you can tear it. Fold the strip in
half, and loop the folded end around 2 of the wires. Put the loose ends
through the folded end, and pull tight. Repeat this process over and over.
I looped the 2 wires on the left, then the 2 wires on the right, then the 2 wires
in the middle, AND REPEAT. It's a little time consuming... I think I watched
Kim Kardashian's Fantasy Wedding while I did this project =)


When you are finished tying the strips all the way around, you may need to trim
the wreath if some strips ended up being too long. This is a simple, quick step =)
The back of the wreath should look like this:

The back of the wreath should look like this:

To make the rosettes, I tied a knot at the end of the ribbon. Then turn, twist,
and roll the ribbon around and around. You can hot glue every once and
a while to secure the rosette. Once the rosette is the size you want, just
cut the ribbon and glue it down.
After I made the rosettes using my black and white ribbon pieces,
I decided it needed more color. So I bought a purple fabric remnant, cut
it in strips, and did the same thing.


I also bought a fake black rose (at the dollar store) that had black leaves
attached to it. I took the leaves off to add to my wreath. I think the wreath
would have looked fine without it, but oh well.
I find it helpful to arrange the rosettes on the wreath as you are making them so
you know whether you need to make a small, medium, or a large rosette, and so you
can decide what color rosette you need to make next. Once you are satisfied with
the rosette and leaf placement, then it's time to glue. I leave everything in place,
and hot glue each item one at a time, working from the top of the cluster down.
I personally like the leaves to come from under the rosettes, so I glue the leaf first.

The "H" initial that I already had was painted gold shimmer from a previous
party. I figured I would use the gold H again, possibly around Christmas time,
so I didn't want to paint over it. The good thing about H's is that I could flip it
over and use the backside, and it's still an H =) So I painted it black. It
didn't really give the look I was going for, so I put purple glitter glue over
the black paint. I had to do about 6 coats of this to get the amount of
sparkle that I wanted, but at least it was fast drying.


Since I didn't want to ruin the gold shimmer side of the H, I couldn't
hot glue the H to the wreath. Instead, I tied fishing line around the H in
two places, and tied it to the wreath. It's not very noticeable, and it
does the job of holding the H in place.


Then, tie a ribbon at the top of the wreath, and it's done!!
Hope you have a great week!! God bless =)

Hope you have a great week!! God bless =)

0 comments:
Post a Comment